Important Disclaimer
eBikeGarageHQ provides educational content and estimates only. We are not certified installers, financial advisors, or electricians. Always consult with licensed professionals.
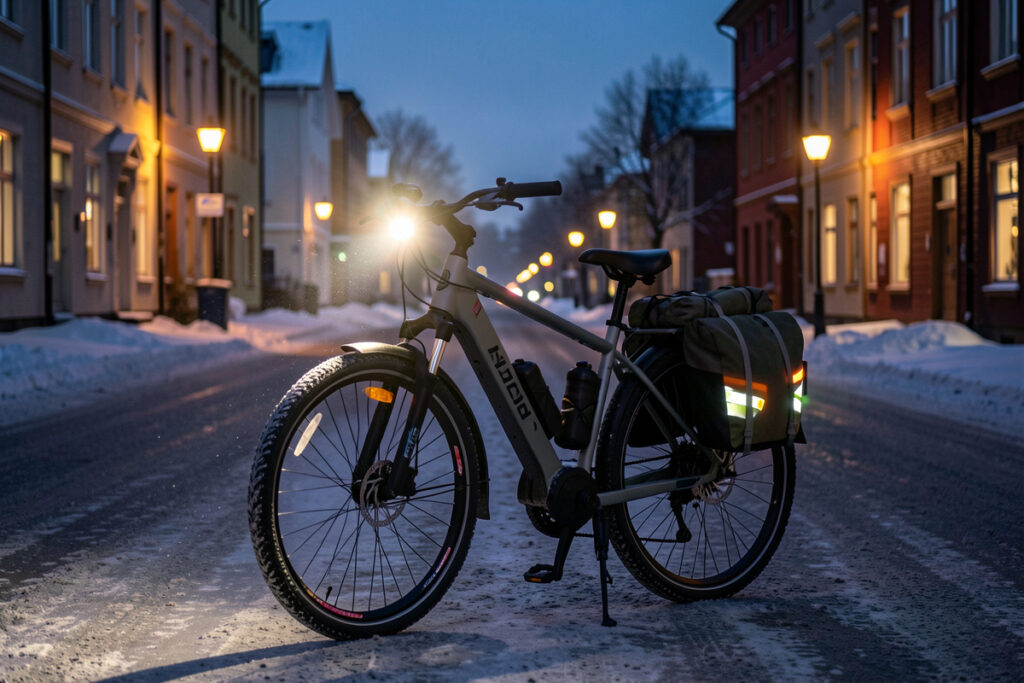
An e-bike commuter loadout is the fixed set of gear that turns a fair-weather bike into a year-round vehicle: lights, fenders, a rack and panniers, winter tires, two locks, and visibility kit. In my Swedish garage that loadout is the difference between riding 320 days a year and parking the bike in October.
I commute on a Bosch mid-drive and a hub-drive value bike — both EN 15194 pedelecs under the EU 250 W / 25 km/h rules — through four honest seasons here, and the loadout below is what survived the sorting — the stuff I actually keep bolted on after a winter of wet mornings, black ice, and 16:00 darkness. This is the hub guide. Each system gets its own deep-dive, and I link them as we go. Nothing here is accessory-page padding; every item earns garage space because it changed a commute.
What a Commuter Loadout Actually Is
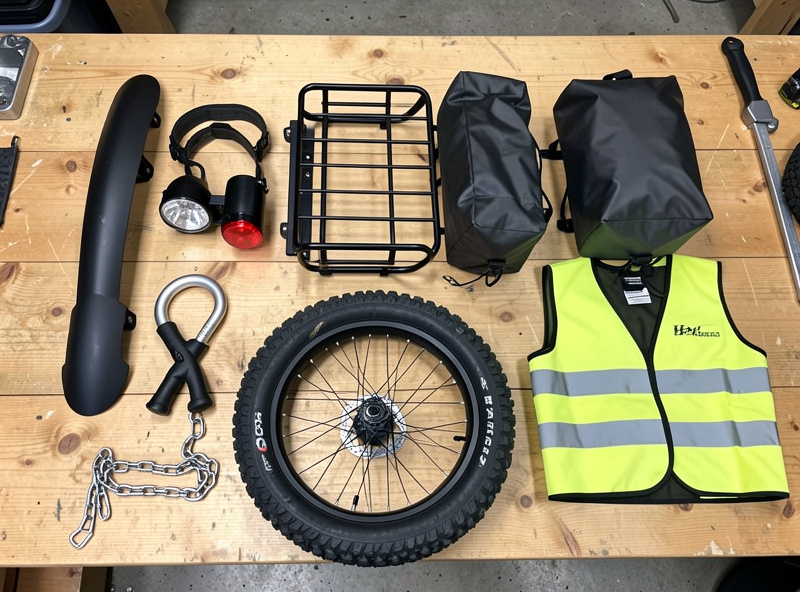
A loadout is not a shopping list you buy once. It is a layered system where each piece covers a failure mode of daily riding. Lights cover darkness. Fenders cover the spray that ruins your drivetrain and your back. A rack and panniers cover the load you used to put in a car. Studded tires cover the four weeks a year that black ice would otherwise own. Two locks cover the fact that an e-bike is a 2,000-euro target that lives outside. Visibility gear covers the driver who is not looking for you in the Nordic dark.
The mistake I see most is buying a great bike and then treating the loadout as optional extras. The bike is maybe half the spend on a serious commuter; the loadout is the other half, and it is the half that decides whether you ride in November. I budget it as one purchase, not as impulse buys when each problem finally bites.
The Five Systems, Ranked by What Stops You First
Order matters. If you commute year-round in a northern climate, here is the sequence I tell people to buy in, because it matches the order that problems take you off the bike. Darkness comes first — it arrives in autumn and it is non-negotiable. Spray comes next, because a wet drivetrain is a worn drivetrain. Then traction for the ice weeks, then security so the bike survives being parked, then the high-visibility layer that makes you legible to traffic.
My winter lighting guide covers the first system in depth — why a flashing blinky is not a commuter light and what lumens actually buy you on an unlit cycleway. The fenders, racks and panniers guide handles the cargo-and-spray layer. Studded tires for winter is the traction deep-dive. The two-lock security strategy is how I park a bike I want to see again, and the high-visibility gear guide closes the loop on being seen in the dark.
Lighting: The First Thing Winter Takes Away
At my latitude, useful daylight in December is gone by 15:30. A commuter light is not a be-seen flasher; it is a see-the-road headlight with a shaped beam, run off either the bike battery or a dedicated USB pack. On my mid-drive the light runs off the main pack through the system port, which is clean but means the light load shows up in my range math — a real headlight pulls a few watts and on a cold ride those watts compete with the motor.
What I look for is a headlight in the 50–100 lux range with a cutoff beam so I am not blinding oncoming cyclists, plus a rear light that is steady, not strobing — a strobe makes it hard for a driver to judge your distance. I run a steady rear plus a second blinking light on my bag for redundancy. The full breakdown of lumens versus lux, battery-port versus USB, and the lights that actually survived a Nordic winter is in the lighting guide. If you only fix one thing before autumn, fix this one.
Fenders, Racks and Panniers: The Cargo and Spray Layer
Full-coverage fenders are the least glamorous and most important upgrade on a commuter. A wet road throws a continuous stripe of grit up your back and straight into your bottom bracket and chain. On a mid-drive that grit is expensive — it grinds a chain and chainring that already live under motor torque. Proper fenders with a mudflap cut my drivetrain wear noticeably and kept the stripe off my work clothes.
A rack-and-pannier setup is what replaces the car trips. I run a rated rear rack and a pair of waterproof roll-top panniers, and I stopped wearing a sweaty backpack the day they arrived. The weight rides low over the rear axle instead of on your spine, which matters more on an e-bike because the bike is already heavy and you feel load high up far more than load down low. The fenders, racks and panniers guide goes deep on rack weight ratings, why a hub-motor rear wheel changes pannier choice, and how to keep heel strike off the bags.
Traction: Studded Tires for the Ice Weeks
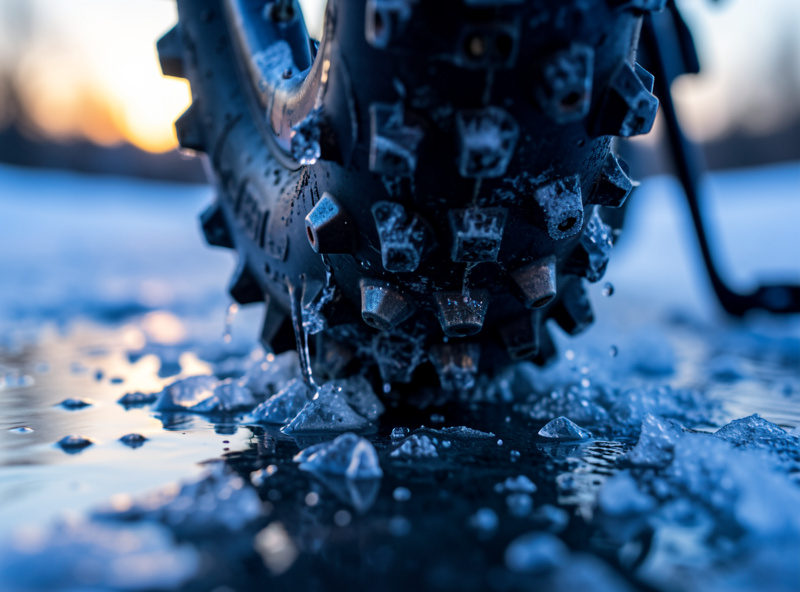
There are maybe three to five weeks a year here where the cycleway is genuinely icy, and studded tires own those weeks completely. A carbide-stud winter tire turns black ice from a crash into a non-event — the studs bite the glaze that a normal tire skates across. They are slower and buzzier on bare tarmac, which is the trade, so I run them seasonally rather than year-round.
On an e-bike the studded-tire decision has an extra wrinkle: the bike is heavier and the motor delivers torque the moment you pedal, so a rear tire that breaks traction on ice does it under power. That is why I value studs more on an e-bike than I did on my analog bike. The studded tire guide covers stud count, tire pressure on ice (lower than you think), the heavier rolling resistance hit to your Wh/km budget, and when to actually fit and pull them.
Security: Two Locks, Because the Bike Lives Outside
An e-bike parked in town is a high-value target, and the single biggest mistake is one lock. My rule is two locks of different types — a hardened U-lock or chain through the frame and rear wheel to a fixed object, plus a second lock that defeats a different tool, so a thief carrying one cutter is stopped. The two-lock approach is about forcing a thief to carry two tools and spend two lots of time, which is what actually moves them to an easier bike.
For commuting specifically, the loadout angle is the daily routine: where you lock at work, the rack you trust, removing the battery or display when the bike sits all day, and a tracker as a recovery backstop. My two-lock security strategy lays out the exact locking drill I use at a public rack, and for the deeper anti-theft picture — trackers, battery theft, home storage — see the full e-bike security guide. Security is the system people skip until the bike is gone; build it in from day one.
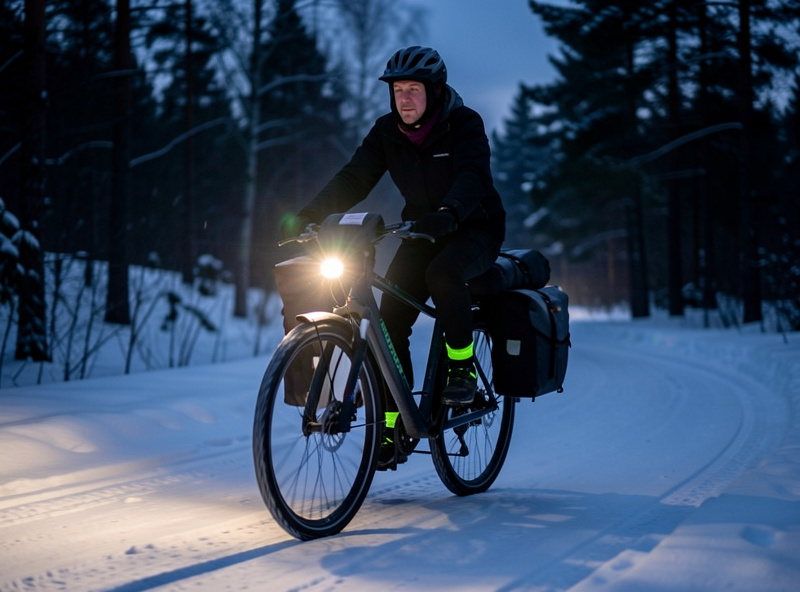
Visibility: Being Seen in the Nordic Dark
Lights make you a point of light; visibility gear makes you a recognizable shape. In a Nordic winter you commute in the dark on both ends of the day, often in rain or falling snow that eats contrast. I run a reflective vest or a jacket with retroreflective panels, reflective ankle bands that move and catch a driver’s eye, and reflective tape on the fenders and panniers. Movement is the trick — a reflector on a moving ankle reads as a cyclist far faster than a static patch.
This is the cheapest system in the loadout and the one that does the most to keep you out of a hospital, so I treat it as non-optional rather than as a fashion choice. The high-visibility gear guide covers retroreflective versus fluorescent (you need both, for different light conditions), where placement actually matters, and the specific kit I run through a Swedish winter.
Fit and Mounting: Where Loadouts Quietly Go Wrong
The loadout fails most often not because someone bought the wrong gear but because it was mounted wrong, and an e-bike punishes sloppy mounting harder than an analog bike does. The bike vibrates more under motor torque, it is heavier so brackets carry more load, and the frames are often non-standard, which means a rack or fender that fits a normal bike may foul the motor, the battery, or a fat tire. I check three things on every install.
First, clearance: a fender has to clear a wider winter tire with room for packed snow, so I set it with a fatter gap than a summer fender needs. Second, bracket security: I use thread-locker on rack bolts and re-torque them after the first week, because motor vibration walks fasteners loose — this is the single most common loose-bolt I find in my garage. Third, heel and stud clearance: panniers have to sit far enough back that my heel does not strike them, and studded tires need mudguard room so the studs do not tick the fender on every rotation. Get the mounting right once and the loadout disappears into the bike; get it wrong and you fight a rattle all winter.
The Maintenance Rhythm a Loaded Commuter Needs
A fully kitted four-season commuter asks for a service rhythm a fair-weather bike never does, because salt, spray, and the extra weight of cargo all accelerate wear. Winter road salt is the quiet killer — it pits chains, seizes cables, and corrodes contacts, so after a salty ride I wipe the chain and re-lube with a wet lube that clings instead of washing off. Under motor torque a chain stretches faster than most riders expect, and I track chain wear with a gauge rather than guessing, because a worn chain eats an expensive chainring on a mid-drive.
Brakes get checked more often too: at e-bike weight with loaded panniers, pads wear faster and you want full braking on an icy descent. I keep the battery contacts clean and dry, store the pack indoors overnight in deep cold, and give the whole bike a rinse-and-dry after the worst salt days. None of this is hard, but it is the tax a real commuter pays, and budgeting an hour every couple of weeks keeps the whole loadout — and the bike under it — alive for years instead of seasons. The drivetrain side is the same logic I apply to hub versus mid-drive maintenance generally.
How the Loadout Compares: Priority, Cost and Season
Here is how I rank the five systems when someone asks what to buy first on a limited budget. The “stops you first” column is the failure mode that ends your commuting season if you skip it. Prices are rough street ranges for decent, not premium, gear.
| System | Buy priority | Rough cost | Stops you first when | Season |
|---|---|---|---|---|
| Lights (head + tail) | 1 | 40–120 | Autumn darkness arrives | All year, critical Oct–Mar |
| Fenders + mudflap | 2 | 30–70 | First wet week wrecks the drivetrain | All year |
| Rack + panniers | 3 | 80–200 | You need to carry without a backpack | All year |
| Studded tires | 4 | 90–180 | Black ice on the cycleway | Seasonal, Dec–Mar |
| Two locks | 5 | 120–250 | The bike gets parked in public | All year |
| Visibility kit | Cheap, do it now | 25–60 | A driver does not see your shape | All year, critical in dark |
If your budget only stretches to two systems before winter, buy lights and visibility — being seen is survival. Everything else protects the bike or your comfort; those two protect you. As an Amazon Associate I earn from qualifying purchases. Where a search link helps you find the category of gear I describe, I have included one; I never link a specific product I have not described.
The Battery and Range Side Nobody Mentions
The loadout interacts with your battery, and most accessory guides ignore it. Three things tax your winter range: the cold itself, the rolling resistance of studded tires, and a headlight running off the main pack. I log my real range on a repeatable loop with temperature recorded at the wall, and a cold morning on studs with the light on can cost me a fifth of my warm-weather range. That is not a fault in the bike; it is physics, and you plan around it.
The practical answer is range math, not range anxiety. Know your Wh/km on your terrain, derate it for cold using my winter range-loss log, and store the pack properly when it is parked overnight in the cold per the half-charge winter storage rule. The same watt-meter discipline I use on my stationary battery bench applies here — Wh is Wh, the bike just adds wind chill to the discharge curve. For the full picture of how far you actually go, the range guide is the place to start, and the charging cost math shows how cheap the energy actually is.
Build Order and Budget: How I Actually Spend It
If I were kitting a bare commuter from scratch on a sensible budget, I would spend in this order and not skip ahead. First, lights and a reflective vest before the first dark week — call it 80–150 total and do not wait. Second, full fenders with a mudflap, because the first month of wet riding is when drivetrain damage starts. Third, a rated rack and a pair of waterproof panniers, which is the upgrade that genuinely replaces car trips. Fourth, a proper two-lock security setup before you ever leave the bike in town. Fifth, studded tires, bought in autumn before they sell out, fitted when the first ice hits.
The whole loadout for a serious four-season commuter lands somewhere around 400–800 depending on how premium you go, and it is worth every krona because it is what makes the expensive bike useful for the eleven months a fair-weather rider parks it. Whether you are on a hub or mid-drive changes a couple of the choices — pannier fit around a hub motor, drivetrain sensitivity to spray on a mid-drive — but the five systems are the same. Buy the loadout as deliberately as you bought the bike.
Frequently Asked Questions
What is the most important e-bike commuter accessory to buy first?
Lights, then a reflective vest. At northern latitudes darkness arrives in autumn and ends your riding season before anything else does. A see-the-road headlight plus a steady rear light and a high-visibility layer is survival kit; everything else protects the bike or your comfort. Budget 80 to 150 and buy it before the first dark week.
Do I really need studded tires for e-bike winter commuting?
If your route ices over, yes. There are only three to five genuinely icy weeks a year here, but carbide studs turn black ice from a crash into a non-event. On an e-bike it matters more than on an analog bike because the motor delivers torque instantly and a rear tire breaks traction under power. Run them seasonally to avoid the rolling-resistance penalty on bare tarmac.
How much should a full e-bike commuter loadout cost?
A complete four-season loadout of lights, fenders, rack and panniers, studded tires, two locks and visibility gear runs roughly 400 to 800 in decent, non-premium gear. That is often close to half the cost of the bike, and it is the half that decides whether you actually ride in November. Budget it as one deliberate purchase, not as impulse buys.
Why do fenders matter so much on an e-bike?
Full-coverage fenders with a mudflap stop the continuous stripe of road grit that a wet road throws up. On a mid-drive that grit grinds a chain and chainring already working under motor torque, so it directly shortens drivetrain life. Fenders also keep the spray off your back and work clothes, which is the difference between commuting and not.
Does winter gear reduce my e-bike range?
Yes, measurably. Cold cells, the rolling resistance of studded tires, and a headlight drawing off the main pack all tax range. On my logged loop a cold morning on studs with the light on can cost about a fifth of warm-weather range. It is physics, not a fault. Plan with Wh per km math derated for cold rather than trusting the marketing range number.
Why two locks instead of one good lock?
Two locks of different types force a thief to carry two different tools and spend two lots of time, which pushes them toward an easier target. One lock, however good, defeats one tool. The two-lock rule plus removing the battery or display on a long park, and a tracker as a recovery backstop, is the practical commuter security baseline.