Important Disclaimer
eBikeGarageHQ provides educational content and estimates only. We are not certified installers, financial advisors, or electricians. Always consult with licensed professionals.
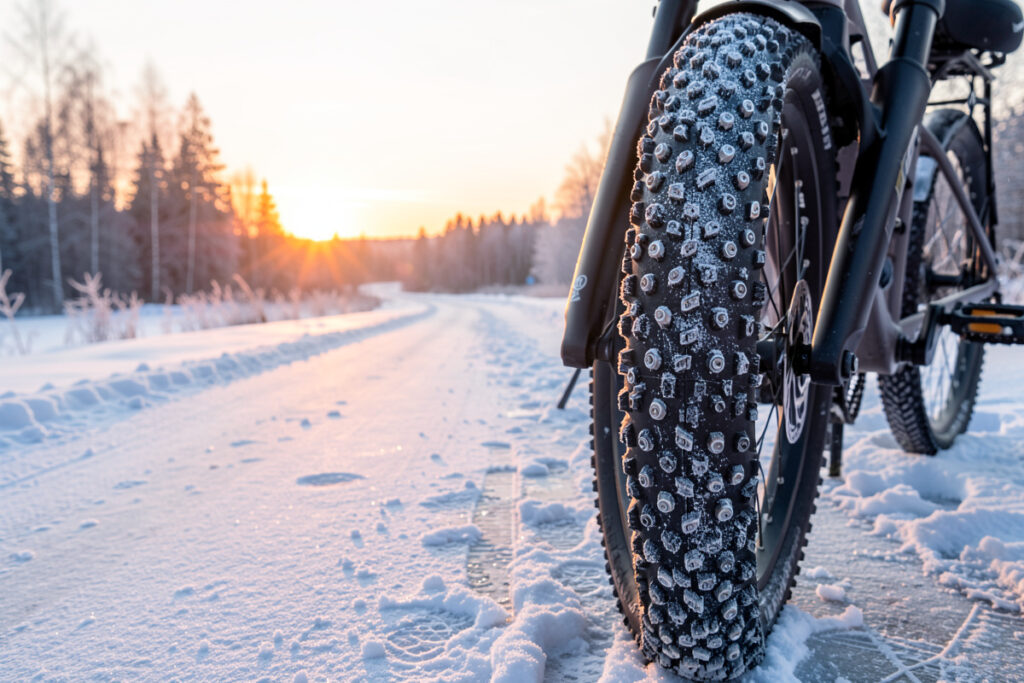
Studded tires for e-bike winter riding are carbide-pin tires that bite through the glaze of black ice a normal tire skates across. On my Swedish commute they own the three to five genuinely icy weeks a year completely — they turn the morning that would have put me on the tarmac into an uneventful ride. They matter more on an e-bike than an analog bike, because the motor delivers torque the instant you pedal.
This is the traction layer of my e-bike commuter loadout. Studs are not a year-round tire — they are slower and buzzier on bare road — so the real questions are how many studs you need, what pressure to run on ice, when to fit and pull them, and what they cost you in range. Here is what a season of winter commuting on them taught me.
Why an E-Bike Specifically Needs Studs
On a regular bike you can feather your effort when a patch of ice appears. An e-bike with a torque sensor delivers assist the moment you push the pedal, so a rear tire that breaks traction on ice does it under power, and the back end steps out faster than you can react. That instant torque is exactly why I value studs more on my e-bikes than I ever did on my analog bike — the failure mode is quicker and the bike is heavier, so a slide carries more energy.
Black ice is the specific enemy. It is the thin, near-invisible glaze that forms on cycleways after a thaw-freeze cycle, and a standard tire has no grip on it at all — it is like riding on glass. Carbide studs press into that glaze and hold. Fresh snow is actually less of a problem than ice; it is the polished, refrozen surface that drops riders, and studs are the only thing that reliably handles it.
How Many Studs Do You Actually Need?
Stud count is the spec that gets oversold. More studs grip better on solid ice but roll heavier and louder on clear road, and most commuters spend most of their winter on roads that are merely wet or lightly slushy, not glazed. For a typical city commute a mid-count tire in the 100–150 stud range is the sweet spot — enough bite for the ice days without feeling like you are dragging an anchor on the clear ones. Riders who face long stretches of solid lake-ice or polished trail go for the higher counts of 200-plus.
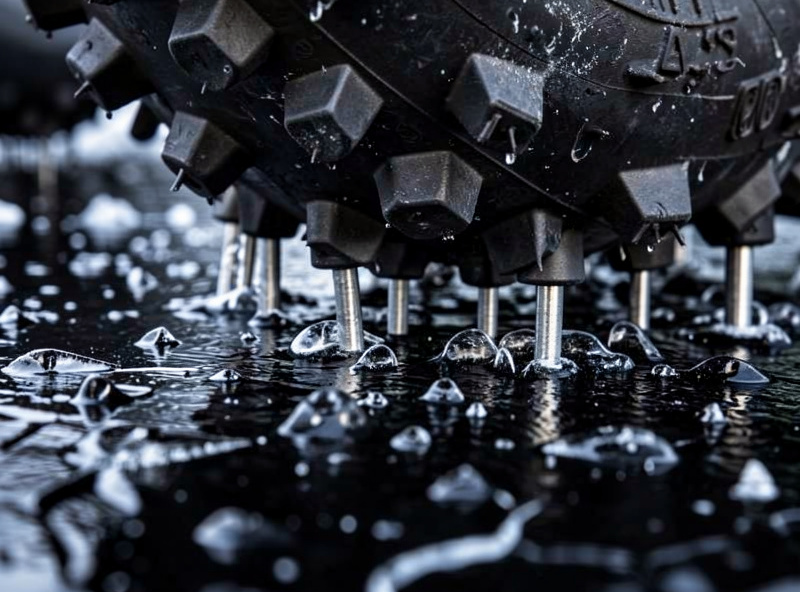
Stud material and placement matter as much as count. Carbide-tipped studs last for seasons; cheaper steel studs round off and stop biting. Friction testing by Sweden’s VTI road and transport research institute is consistent with what you feel in the saddle — carbide studs restore a usable fraction of bare-road grip on glaze, where a studless tire on the same surface has almost none. Placement on the shoulder of the tire is what holds you in a lean, so a tire with studs only down the centre line will let go when you turn on ice. I would rather have a well-placed mid-count tire than a cheap high-count one with soft studs.
Tire Pressure on Ice: Lower Than You Think
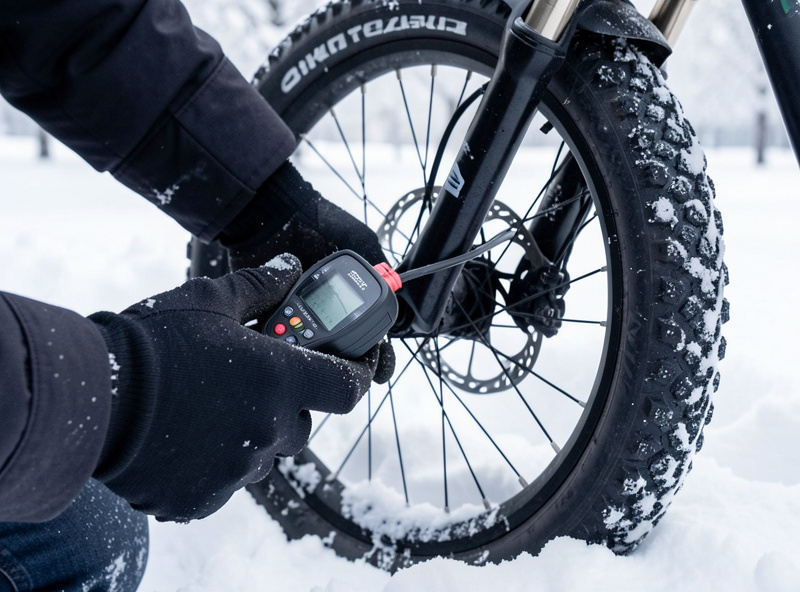
The single biggest mistake I see is running winter pressure too high. On ice you want a larger contact patch so more studs are in contact with the surface, which means running pressure noticeably lower than your summer setting — toward the bottom of the tire’s stated range. A rock-hard tire rides on a small patch and fewer studs bite. Dropping pressure lets the tire conform and puts more carbide on the ice.
There is a balance, because too low invites pinch flats and squirm on bare road, so I adjust to conditions rather than setting once for the season. On a hard-frozen, glazed morning I run softer; on a clear, cold day with dry road I add a little back. The e-bike weight helps here — the extra mass presses the studs in, so heavy riders and loaded commuters get good bite without going to extremes.
The Range Cost: Studs Are Not Free
Studded tires roll heavier than summer tires, and on an e-bike that shows up directly in your energy budget. The added rolling resistance raises your Wh per km, and it stacks on top of the cold-battery range loss that winter already brings. I log my range on a repeatable loop with temperature recorded, and the combination of cold cells plus studs plus a headlight is what produces the big winter range drop — not any single factor. Studs alone are a modest hit, but they are part of why your winter range looks nothing like the summer number.
The way to manage it is range math, not surprise. Know your Wh per km on your terrain, expect a higher figure on studs, and read my cold-weather range-loss log for how much the cold itself takes. None of this is a reason to skip studs — staying upright is worth a slice of range — but plan the commute around the winter number, not the marketing one.
Studded vs Standard Winter Tire: When Each Wins
Not every winter commute needs studs. If your roads are kept clear and salted and rarely glaze, a good non-studded winter tire with a soft, grippy compound and an aggressive tread may be enough, and it rolls faster. Studs earn their keep specifically where black ice forms.
| Surface | Studded tire | Non-studded winter tire |
|---|---|---|
| Black ice / glaze | Grips well | No grip — skates |
| Packed snow | Good | Good with soft compound |
| Wet or slushy road | Fine | Fine, rolls faster |
| Clear cold tarmac | Buzzy, slower | Better |
| Range cost | Higher | Lower |
My rule: if your route ever glazes over, run studs for the season and accept the trade. If it never truly ices, a soft-compound winter tire is the smarter pick. As an Amazon Associate I earn from qualifying purchases. To see the type, a search for carbide studded winter bike tires shows the carbide-pin construction I look for. Pair the tires with proper winter lights and you are set for the dark, icy months.
Frequently Asked Questions
Are studded tires worth it for an e-bike?
If your route ever glazes with black ice, yes. Carbide studs grip the thin refrozen glaze that drops riders, and they matter more on an e-bike because the motor delivers torque instantly and a rear tire can break traction under power. There are only a few genuinely icy weeks a year, but studs make those weeks safe rather than dangerous.
How many studs does an e-bike winter tire need?
For a typical city commute a mid-count tire of roughly 100 to 150 carbide studs is the sweet spot, gripping the ice days without feeling like an anchor on clear roads. Riders facing long stretches of solid lake-ice or polished trail go for 200-plus. Shoulder placement and carbide tips matter as much as raw count.
What tire pressure should I run on studded e-bike tires?
Lower than your summer pressure, toward the bottom of the tire’s stated range. A softer tire spreads the contact patch so more studs touch the ice and bite. Run softer on glazed mornings and add a little back on clear dry days. E-bike weight helps press the studs in, so loaded commuters get good grip without extremes.
Do studded tires reduce e-bike range?
Yes, modestly. Studded tires roll heavier than summer tires, raising your Wh per km, and that stacks on top of cold-battery losses. The big winter range drop comes from cold cells, studs and lights combined, not studs alone. Plan your commute around the winter range number rather than the summer or marketing figure.
When should I fit and remove studded tires?
Fit them before the first hard freeze of the season, which often means buying in autumn before stock sells out, and run them through the icy weeks. Pull them once the glaze risk has passed for spring, because running studs on bare tarmac wears the carbide tips and costs you range and speed for no benefit.
For the rest of the four-season kit, see the full commuter loadout guide, the fenders and panniers setup that keeps the slush off your drivetrain, and the winter battery storage rule for the pack that powers it all.