Important Disclaimer
eBikeGarageHQ provides educational content and estimates only. We are not certified installers, financial advisors, or electricians. Always consult with licensed professionals.
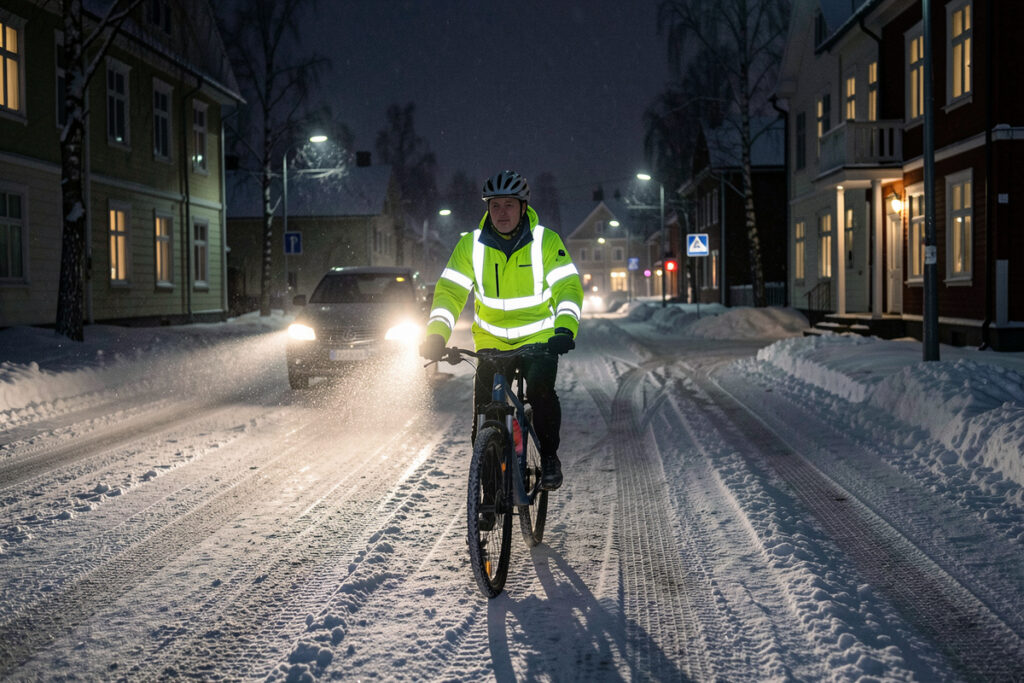
High-visibility e-bike gear for the Nordic dark is the layer that makes you a recognizable shape to drivers, not just a point of light: retroreflective material that throws headlights straight back — lifting you from the roughly 30 metres at which a driver picks out dark clothing to around 150 metres of warning distance — fluorescent colour for the grey hours, and reflectors on the parts of you that move. Through a Swedish winter I commute in darkness on both ends of the day, and this is the cheapest gear in the loadout doing the most to keep me out of a hospital.
Lights make you visible as a dot; visibility gear makes you legible as a cyclist. The two do different jobs, and you need both. This guide is the visibility layer of my e-bike commuter loadout, written from daily use in the genuine Nordic winter dark, not from an accessory catalogue.
Retroreflective vs Fluorescent: You Need Both
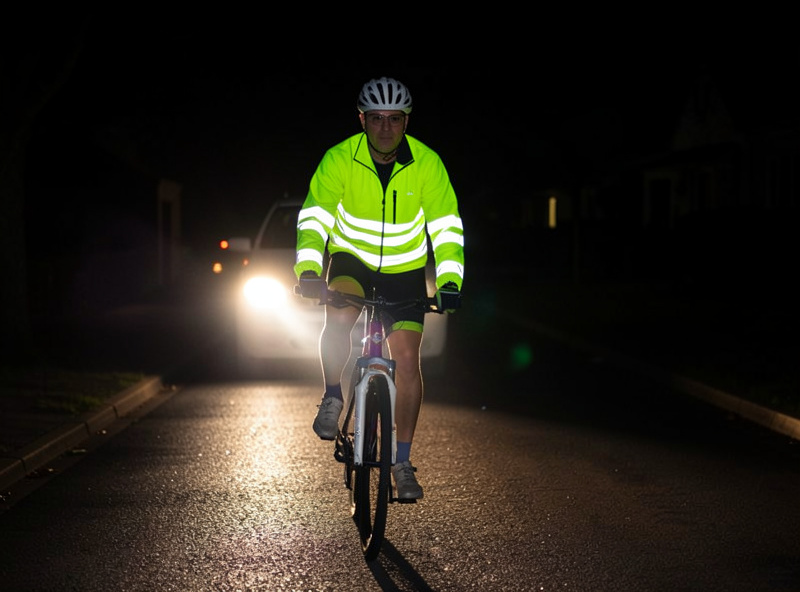
These two materials solve different problems and people constantly confuse them. Fluorescent colours — hi-vis yellow, orange — work in daylight and twilight by glowing under ambient ultraviolet, which makes them pop in the grey, flat light of a Nordic afternoon. But fluorescent does nothing in true darkness, because there is no ambient light to react to. That is where retroreflective material takes over: it bounces a car’s headlights directly back to the driver, lighting you up like a road sign the instant a beam hits you.
Because the Nordic winter commute spans both twilight and full dark, I run both. A fluorescent shell for the dim hours with retroreflective panels and piping for when the headlights arrive. A garment that is only fluorescent vanishes at night; one that is only retroreflective is invisible until a headlight finds it. The combination covers the whole spectrum of light you actually ride through.
| Material | Works in | How it works | Weak point |
|---|---|---|---|
| Fluorescent colour | Daylight, twilight | Glows under ambient UV | Useless in true dark |
| Retroreflective | Darkness, headlights | Bounces light back to source | Needs a light aimed at it |
Movement Is the Trick: Reflectors That Move
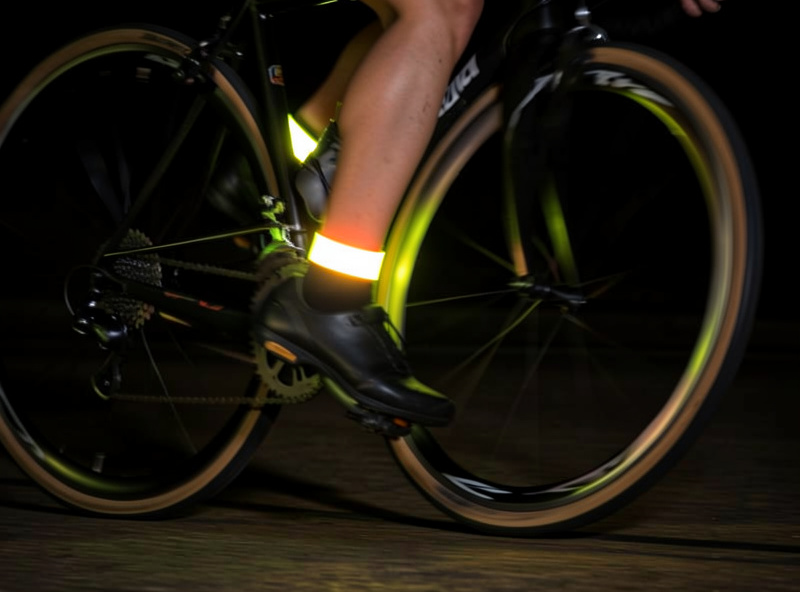
The single most effective bit of visibility kit I own is a pair of retroreflective ankle bands, and the reason is movement. A static reflective patch on your back reads as “something reflective by the road.” A reflector going up and down at pedalling cadence reads instantly and unmistakably as a person on a bike — the human eye locks onto biological motion. Drivers recognize you as a cyclist far faster from moving ankle reflectors than from a much larger static panel.
That is why I prioritize reflective material on the moving parts: ankles, the backs of gloves, pedals, and the rotating wheels via reflective tire sidewalls or spoke reflectors. The pedalling motion and the spinning wheels create a recognizable, dynamic signature that nothing static matches. Ankle bands are cheap, weigh nothing, and clip over any trousers, which makes them the highest-value visibility purchase you can make.
Layering Visibility Across the Whole Bike and Rider
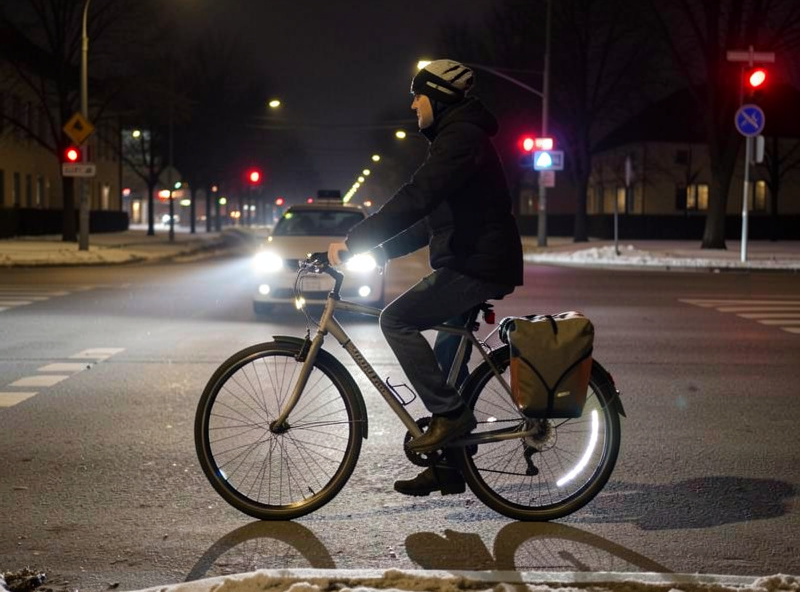
Visibility is not one garment, it is a system spread across the rider and the bike. On the rider I run the fluorescent-plus-reflective shell, ankle bands, and reflective gloves. On the bike I add reflective tape to the fenders and the panniers — those big flat surfaces are perfect for it — plus the legally required reflectors and reflective tire sidewalls. The goal is to be visible from every angle: front, rear, and crucially the side, where a cyclist crossing a junction is most often missed by a turning driver.
Side visibility is the gap most riders leave open. Front and rear are covered by lights, but a driver pulling out of a side road sees you in profile, and that is where reflective wheel sidewalls and pannier tape earn their place. I think about my visibility as a 360-degree shape rather than a front light and a back light, because the collision risk in winter is as much from the side as from ahead or behind.
Snow and Rain: The Contrast Problem Nobody Warns You About
Falling snow and heavy rain do something to visibility that catches riders out: they eat contrast and scatter light. In a snowfall, a driver’s headlights bounce off millions of flakes, creating a bright haze that washes out a dim or static reflector. The same happens with rain on a windscreen — every droplet smears and diffuses oncoming light. This is exactly when you are hardest to see, and it is also when riders assume their hi-vis is doing its job.
The answer is brighter, larger, and moving reflective material rather than a single small patch. In falling snow a big retroreflective panel or a moving ankle band cuts through the haze where a small reflector disappears. I also lean harder on the fluorescent layer in daytime snow, because the flat white-out light of a snowy afternoon flattens everything to grey, and a fluorescent shell is the one thing that still has colour. Plan your visibility for the worst weather you ride in, not the clear nights — the clear nights were never the problem.
Where Placement Beats Quantity
You do not need to cover yourself head to toe; you need reflective material in the right places. Beyond the moving ankles, the highest-value spots are anywhere that defines your outline and direction. Reflective material on the backs of gloves means your hand signals are visible at night, which is a genuine safety function, not decoration. A reflective band high on the back catches a following driver’s headlights at the right height. Helmet reflectives sit at the top of your silhouette where a driver’s eye scans first.
Quantity past a point gives diminishing returns; a rider wrapped entirely in reflective tape is not meaningfully more visible than one with well-placed material on ankles, hands, back and helmet, plus the bike’s own reflectors and tape. I would rather see someone put the budget into a couple of high-quality, well-placed pieces and the moving-reflector ankle bands than blanket themselves in cheap tape. Think about the shape and the motion you are creating for a driver, and place the reflective material where it draws that shape.
Keeping It Working Through a Wet, Salty Winter
Visibility gear degrades, and a faded reflector is a false sense of security. Retroreflective material loses brightness as it gets coated in road grime and salt film, so I wipe down reflective surfaces along with my lights and check that ankle bands and tape have not peeled or dulled. Fluorescent fabric fades with washing and UV over a couple of seasons, so a hi-vis shell that has gone pale is doing less than you think and is worth replacing. When you buy the shell, a garment certified to EN ISO 20471 (or EN 1150, the standard written specifically for non-professional cyclist visibility clothing) guarantees a tested minimum of fluorescent and retroreflective area rather than a marketing claim about “reflective accents”.
The good news is this is the cheapest layer to maintain and replace. Ankle bands and reflective tape cost almost nothing, so I treat them as consumables and refresh them rather than nursing tired gear through another winter. As an Amazon Associate I earn from qualifying purchases. To start with the highest-value item, a search for reflective cycling ankle bands shows the moving-reflector kit I rate above everything else.
Don’t Forget the Bike’s Own Legal Reflectors
Visibility starts with the reflectors your bike is legally meant to carry, and it is worth checking they are actually there and clean, because they often get knocked off or grimed over and nobody notices. A rear red reflector, front and rear pedal reflectors, and side reflectors or reflective tire sidewalls are the baseline in most Nordic jurisdictions, and they work even when your lights fail. I treat them as the foundation that the rider-worn gear builds on, not as an alternative to it.
The pedal reflectors deserve a special mention because they tie back to the movement principle — they rise and fall with your cadence, giving the same recognizable motion signature as ankle bands, for free, on every bike. If yours have been removed for clipless pedals or lost to a crash, reflective ankle bands restore that moving signal. Keep the bike’s reflectors intact and clean, add the rider-worn fluorescent and retroreflective layers on top, and you have covered both the legal minimum and the real-world need. Exact requirements vary by country, so check your local rules rather than assuming — the point here is the practice, not legal advice.
The Cheapest Insurance in the Loadout
Of every system in the commuter loadout, visibility gear costs the least and protects you the most directly. Lights, fenders, racks, locks and tires protect the bike or your comfort or your range; visibility protects your body from the driver who simply did not see you in the dark. For the price of a single tank of petrol you can kit yourself in fluorescent-and-reflective layers, ankle bands, and reflective tape that make you legible from every angle — and in a Nordic winter, being seen is the whole game.
Build it in from the first dark week and treat it as non-negotiable, the same way you treat your winter lights. Together they are the see-and-be-seen pair at the heart of dark-season commuting. For the rest of the kit, my full commuter loadout guide ranks every system by what stops you first, the studded tire guide covers traction for the same icy mornings, and the cold-weather range-loss log explains what the dark, cold season does to your battery so you can plan the commute around real numbers.